Setting Up Member and Regional Access & Reporting (Staff)
Last updated: June 12, 2026
Users receive different reports and access to different information depending on their access level. In this article, we’ll explain the difference between Regional and Member user access, creating new users, and how to manage what communities they can view.
- Understanding Regional and Member Users' Access
- Create a User
- Update Communities in User Reports
- Regional Users Overseeing Multiple Accounts
Understanding Regional and Member Users' Access
Regional users are able to see/receive the following for all communities assigned to them:
- Weekly Friday 30-day Analytics email
- Weekly Messaging Assistant email
- Access to Stats
- Access to All Conversations with ability to respond to propsect messages
- Access to view (but not edit) Messages
- Access to update Communities
- Access to Pricing, Discounts, Contact Info, Job Applicant Emails, Community Groups, CRM, Instant Answers and Email Integrations
Member users have access to a limited dashboard for all communities assigned to them including the following:
- Weekly Remove Prospect from Outreach email
- Access to Schedule Message
- Access to All Conversations with ability to respond to propsect messages
- Access to Pricing, Discounts, and Contact Info
- Access to Pricing, Discounts, Contact Info, Job Applicant Emails, and Email Integrations
Create a User
Log into your Further dashboard.
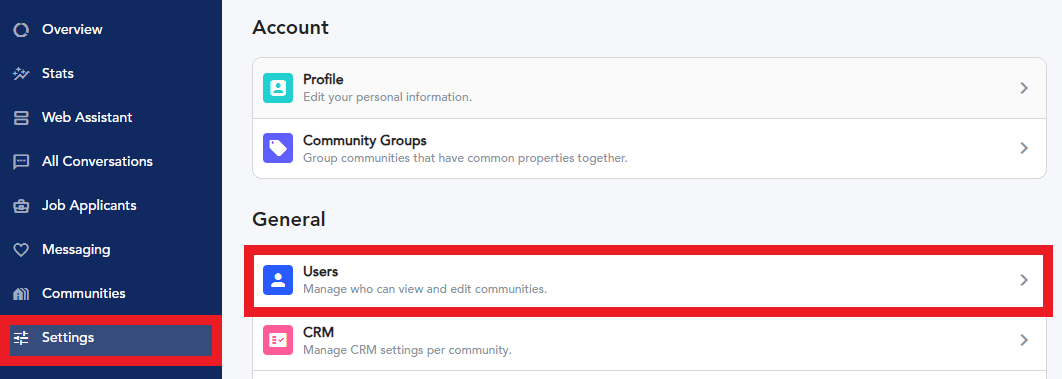
Select Settings in the left menu and then User in the General submenu.
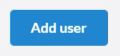
On the new page, click Add user in the top right corner.
Fill in the following fields:
- Type - Use the dropdown to make the new user either a Regional or Member user.
- Email - Enter the user’s email, as this will be used for their dashboard login and email notifications.
- Communities - Enter a community name and select it from the dropdown. These are the communities the user will have access to.
- Send Invite - Toggle the switch to the right to send an invitation email to the address listed above.
-
Invite Expires Days - Enter 14 so that the invitation link will expire if not used within 14 days.

If you are setting up a Regional user, you will also need to select the Trailing 30 days analytics report frequency and whether or not you want them to have access to the dashboard through this report. The report options are Weekly, Monthly, or Never.
In addition, if your Regional user oversees communities under different portfolios, you can choose to Separate Report per Owner. This will allow the recipient to received separate reports per portfolio vs one report for all of the communities they oversee.
Note: The report is sent on Fridays at 7am EST / 4am PST. Changing the settings on the Corporate users Admin profile will not adjust the settings for the Regionals and Members under them.
To Remove Dashboard Access from Report toggle the switch on (blue). To allow access, keep it off (gray). If you remove access, the recipient will have access to the Stats tab of the dashboard only as show in the image below.
If you are setting up a Regional user who oversees communities from multiple portfolios, you can also select whether or not you want to Separate Report per Owner. This would email the recipient a separate report for each portfolio’s communities vs one report for all communities.

When you’re done, click Create in the top right.
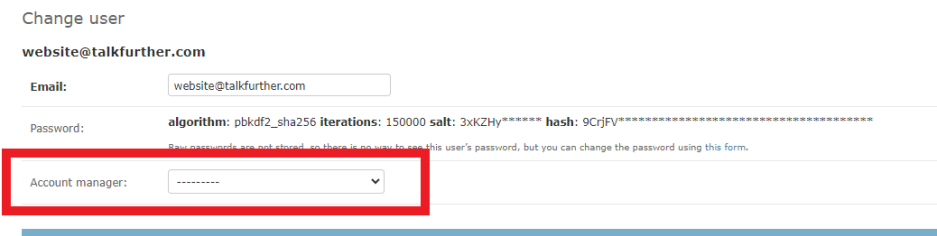
Note: If you do not set up the sender for these reports, they will default to James@talkfurther.com. To change, this log into Admin > Users and select the user. Once inside their profile, scroll to Account manager and update the field to the correct sender. This needs to be done on both the Corporate user level and the Regional user level.
Update Communities in User Reports
You can add or remove communities for a user at any time.
Select Settings in the left menu and then User Accounts in the General submenu.

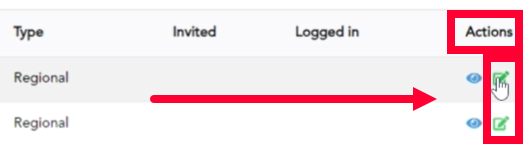
On the Settings page, locate the desired user email. Use the search bar at the top if needed.

Click the paper and pencil icon under the Actions column for the user.
In the user account, scroll to the Communities field. Enter the desired community name and select it from the suggested list. You can select multiple communities.
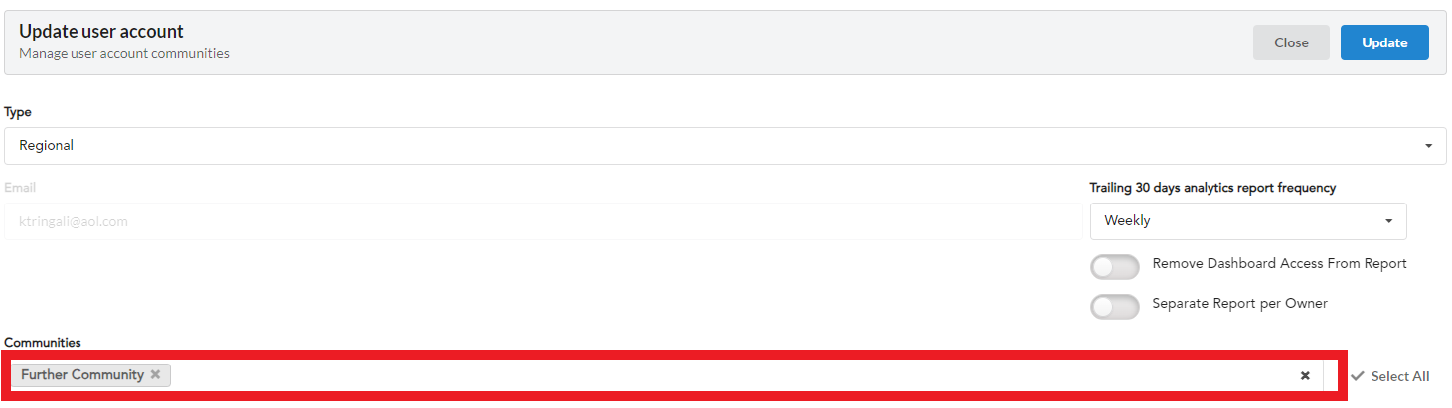
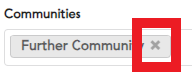
To remove a community, click the X to the right.
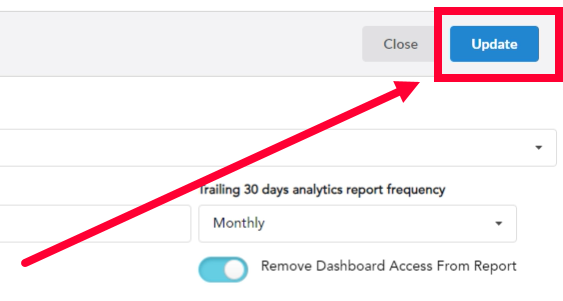
When you’re done click Update to save your changes.
Regional Users Overseeing Multiple Accounts
If a Regional user needs access to profiles from multiple Corporate accounts, you need to adjust their community access.
Collect a list of all the community names and Further IDs.
Open up the admin site: https://api.talkfurther.com/admin/app/regionaluser/
Scroll to the App section and click Regional users.
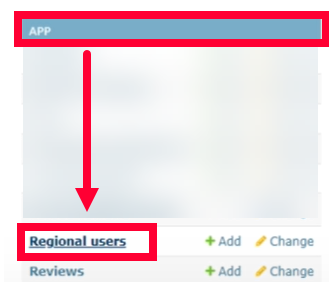
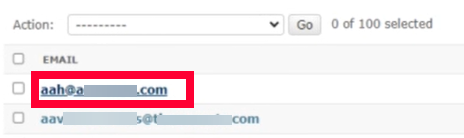
On the new page, use the search bar at the top to find the desired regional user.

Click the user email address to open their profile.
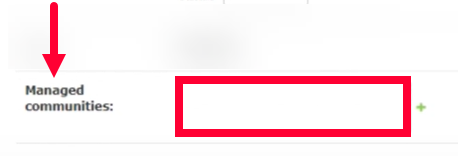
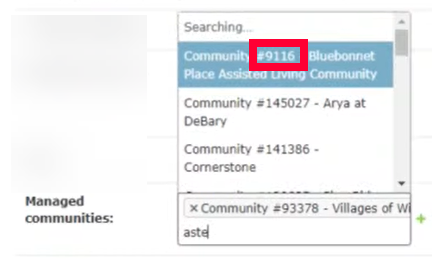
In the user profile, scroll down to the Managed communities section. Enter the desired Community Name into the field.
A list of matching communities will display. Click to add a community. You can add multiple communities.
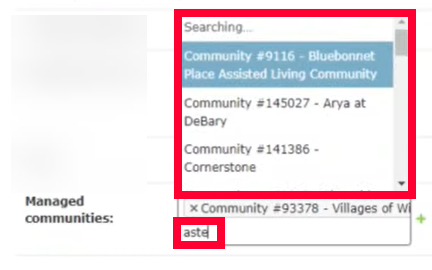
Note: There may be duplicate results for the same community name, check the Further IDs to make sure it matches your list and that you are selecting the correct community.
Tip: After you’ve added the first community from a portfolio, you can save your changes and then follow the steps in the Update Communities in User Reports section to add the remaining communities from that portfolio, without the risk of duplicates or checking Further IDs.
To remove a community, click the X to the left of the ID.

Click Save in the bottom right to keep your changes.
